We write a lot about Microsoft Designer’s Image Creator and its other amazing design creation features. Today, we’d like to give an equally powerful toolkit some much-deserved attention: Designer’s AI editing features.

These powerful and easy options can declutter and transform your photos in just a few clicks. Whether you’re an enthusiastic design novice or a pro, it has never been easier to turn your favorite photos and images into polished masterpieces.
In this post, we’ll introduce you to four of Designer’s AI editing features and show you when and how to use them. Get ready to meet your new besties: Generative Erase, Background Remover, Restyle Image, and Frame Image. Let’s learn what makes this quartet so special!
Remove unwanted objects with Generative Erase
Have you ever taken a perfect photo, only to find an unwanted object or person in the background? Designer's Generative Erase lets you remove any unwanted element(s) from your photo in a couple of clicks.
Unlike more traditional digital erasers, Generative Erase uses AI to predict and fill in the background behind the unwanted object, making it appear as if the object was never there at all.
Pro tip
For a more in-depth overview of Generative Erase, check out the post De-clutter your photos in seconds with Generative Erase in Microsoft Designer.
How Generative Erase works
1. From the Designer home screen, locate Edit with AI and select Generative Erase.

2. Upload your image to Microsoft Designer.
Your image will open in Designer, with the Generative Erase tools highlighted and ready to use.

3. You have two options for removing unwanted elements:
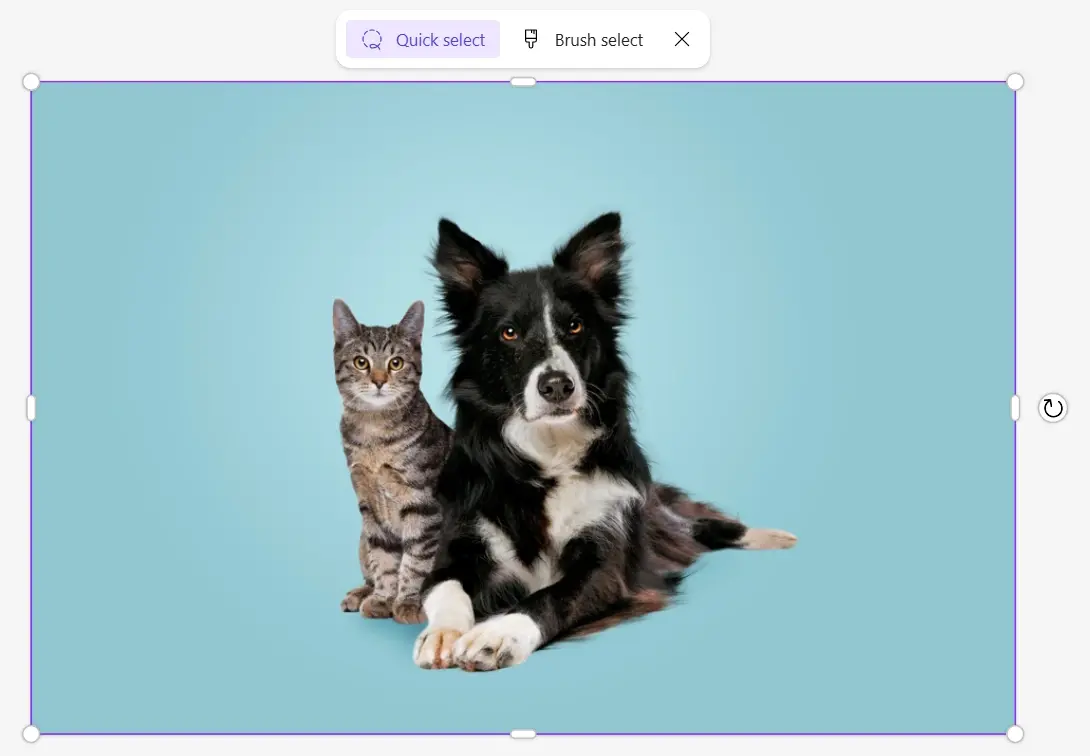
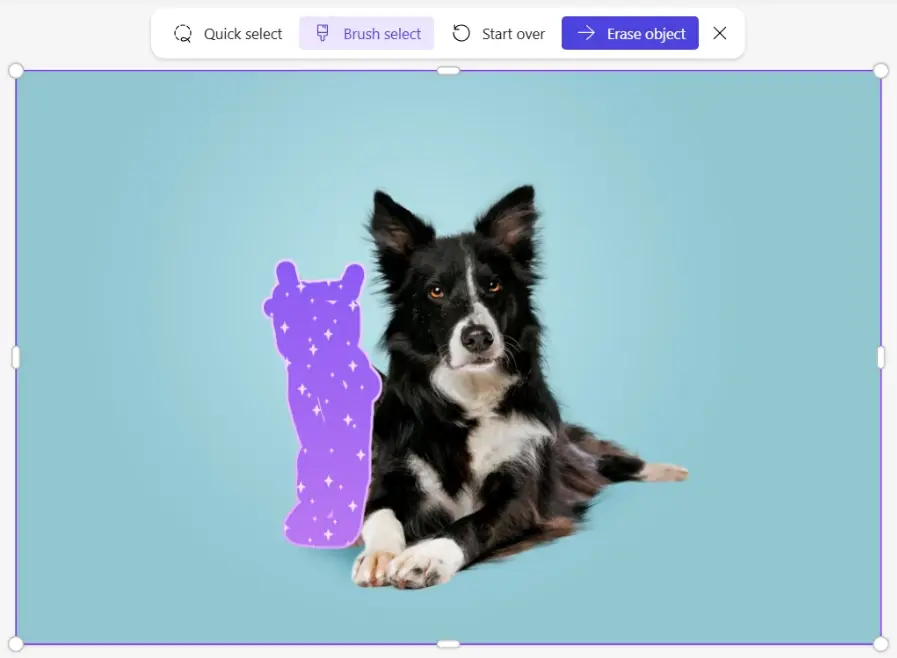
Option 1 - Quick select: Select the object you want removed and Designer will automatically detect its edges.

Option 2 - Brush Select: Paint over the area you want removed. This option gives you more control if the object’s edges are hard to detect.

Try starting with Quick Select, then use Brush Select to clean up missed details like shadows.
Optional: Continue using Designer’s editing features if you want to make other adjustments to your photo.

4. When you’re ready, hit Download and enjoy!
Pro tip
For best results, start with small areas and work your way up to larger objects. The AI works best when it has surrounding context to work with.
Remove backgrounds and isolate your subject
Whether you're creating product images for an e-commerce site or crafting eye-catching social media posts, a clean, isolated subject can make all the difference. Microsoft Designer's Background Remover makes this process a breeze.
How the AI background remover works
1. From the Designer home screen, locate Edit with AI and select Remove background.

2. When prompted, upload your image to Designer.
Your image will open in Designer with its background removed.

3. From here, you have three options:
Option A: If needed, use Generative Erase to clean up missed details and fine-tune your image.
Option B: Select Download to use your image as a transparent PNG (sans background).
Option C: Replace the background with another photo, a solid backdrop, or an image created in Image Creator.
Pro tip
For more Background Remover goodness, learn how to create a magical pet portrait or [make a unique profile picture background] (https://create.microsoft.com/en-us/learn/articles/make-one-of-a-kind-profile-picture-background-with-designers-ai-editing).
Transform photos into unique art with Restyle Image
Want to give your images a creative twist? The Restyle Image feature in Microsoft Designer lets you reimagine any photo in a variety of artistic styles.
How to use Restyle Image
1. From the Designer home screen, locate Edit with AI and select Restyle Image.

2. Option A – Start with a prompt template:
- Browse through the Explore Ideas tab. If you see a style you like, select it to modify the prompt that created it.

- Upload your photo and hit Generate.
Option B – Write your own prompt from scratch:
- Upload your photo to the Image box.
- In the Style box, select the new style you want for your image.
- Use the optional Background Elements box to specify any additional features or elements you’d like to include.
- Hit Generate.

3. Designer will show you several design options. Select your favorite.
On the next screen, you can either Download your new artwork right away or select Edit to keep working on it.

Enjoy your unique piece of art!
Add a personalized frame to any photo with Frame Image
Interested in showcasing a favorite photo? Designer's Frame Image lets you personalize any image with a custom AI-generated frame.
How the AI photo frame creator works
1. From the Designer home screen, locate Edit with AI and select Frame Image.

2. Option A – Start with a prompt template:
- Like before, you can browse the Explore Ideas tab and pick a frame you like to modify its prompt.
Option B – Write your own prompt from scratch:
- Upload your photo to the Image box.
- In the Elements box, add a theme for your frame (birthday, Fall, wedding, etc.) and any specific elements you want to include (confetti, leaves, flowers, birthday cake, etc.).
- In the Style box, select an optional style for your frame.
- Hit Generate.

3. Designer will show you several frame options. Select your favorite.

4. On the next screen, Download your new artwork or hit Edit to refine and clean up your image.
Bonus tip: Use Frame Image + Generative Erase together
Let’s say you've created a frame you absolutely love, but there are minor imperfections in the artwork. For example, the frame below includes a few splotches that don’t really look like anything:

If the imperfections are minor enough (read: removing them won’t leave noticeable gaps in the artwork), you can use Generative Erase to remove them.
Navigate to AI tools, select Generative Erase, and highlight the objects you want removed.
Note: If you run into trouble removing all the unwanted elements in one fell swoop (like we do in the graphic below), try removing them one at a time instead.

Voila!
Now, even in the example above, we’re kind of pushing it with some of the gaps we’ve created. Needless to say, you’ll have to make your own judgement calls on a case-by-case basis. The moral of the story is: Before you throw out an otherwise perfect frame, consider Generative Erase.
Make every photo a masterpiece with Microsoft Designer
From removing unwanted elements and backgrounds to adding custom frames, Designer’s AI editing features make it easy to turn your favorite photos into clean, personalized works of art.
So, don’t let your creative ideas remain just ideas. Head over to Microsoft Designer today and start making your favorite photos even more extraordinary!


