In the world of social media, your profile picture is the first impression you make on potential followers, collaborators, and friends. But with millions of users out there, standing out from the crowd can feel like trying to be heard at a rock concert.
That's where Microsoft Designer’s AI-powered image editing tools come in. Today, we'll pair Designer’s background remover with Image Creator to turn an ordinary selfie into a scroll-stopping masterpiece.
Pro tip
Prefer to use a template? Explore our variety of professionally designed profile picture templates here.
1. Prepare your base image
While Designer can do wonders, starting with a great base image will make it a lot easier for you to achieve the result you want. If you’ll be using a selfie or casual candid shot for your profile pic, let’s talk about choosing the perfect photo to work with.
First up, lighting is your best friend. Natural light is often the most flattering, so try snapping your pic near a window or outdoors on a cloudy day (direct sunlight can create harsh shadows). If you're indoors, avoid standing directly under a light source—it can create unflattering shadows under your eyes and nose.
For composition, follow the rule of thirds: Imagine your frame divided into a 3x3 grid. Now, try to position your eyes (in the selfie) along the top horizontal line. This often creates a more engaging image than centering yourself smack in the middle of the frame.
And finally, be yourself! An authentic smile or a look that reflects your personality will always beat a forced pose. If you're going for a professional vibe, a slight smile with direct eye contact works great. For a more casual feel, don't be afraid to let your quirky side shine.
Before we start working in Microsoft Designer, give your chosen profile pic a quick once-over:
- Is your face clearly visible and in focus?
- Are your eyes open and looking where you want them to?
- Is there anything distracting in the background? (We have the background remover at our disposal, but you can give it a head start by making sure your background is clutter-free to begin with).
- How's your hair looking? We've all had those wayward strands.
If everything looks good, you're ready to start editing.
Pro tip
Most social media platforms use square images, but some (like Facebook) display them as circles. To be safe, imagine a circle inside your square image and make sure all the important parts (like your face!) are inside that circle.
2. Remove the background from your photo
Now the fun begins. To remove the background from your photo, we’ll visit Microsoft Designer’s background remover.
- Head to designer.microsoft.com and locate Edit with AI.

- Select Remove background and upload your chosen picture.
- The tool will automatically remove the background from your photo and open your project in Designer’s image editor.

- If you already have a background image in mind, you can upload it now. If you want to use one of Designer’s professional stock photos or graphics, select Image gallery to explore your options.

Interested in creating your own background? We’ll show you that next!
3. Create a custom background in Image Creator
To create your own AI-generated background:
- Open a new tab and visit Image Creator (From the Designer home screen: Locate Create with AI and select Image Creator).
- Browse through the Explore ideas tab and find a style that represents what you’re aiming for (it’s fine if the subject matter is different).

- Select your favorite artwork to customize the prompt that created it.

- Adjust the image size to fit your needs. Square is a safe bet for profile pictures, but you know your photo best.

- Hit Generate.
- Image Creator will spin several options. If you see an option you like, select it and hit Download. If you don’t, refine your prompt and try again.
4. Replace your profile picture background
Still have the other tab with your profile picture open?
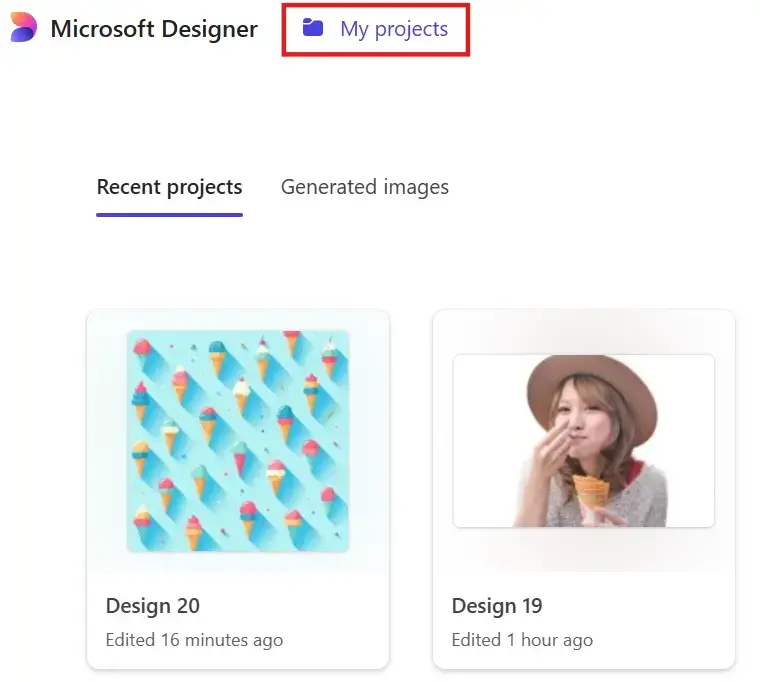
- If you closed it, no worries. From the Designer home screen, navigate to My projects at the top and re-open your project.

- Navigate to My media and upload the background you just generated.
- As soon as you upload your background, it’ll appear under Media in Designer.
- Select the background and drag it to your design.
- Adjust the background’s size until it fills your design canvas. It’ll be on top of the profile picture, and that’s fine.
- Select the background so Designer’s toolbox appears, then select Set as background (the red square in the screenshot below).

And voila! A gorgeous, unique profile picture that perfectly captures your mood.

From here, you can keep editing if you want to add a filter, text, or graphics to your photo.
When you’re done, hit Download to download your image as a PNG, send it to your phone, or copy and paste it into your preferred social platform. You look marvelous!
Stand out in all the right ways with Microsoft Designer
Your profile picture is your chance to make a statement, showcase your personality, and leave a lasting impression. In a few clicks, Microsoft Designer can help you do all three with a one-of-a-kind background that perfectly expresses your style.
So go grab your favorite photo, add it to Designer, and start giving your digital presence a glow-up. Your next profile pic might just be your best one yet.
Happy editing, and may your notifications be ever full of new follower alerts!


